3D Scanning Introduction
If you're new to 3D scanning, then you're in the right place! Below is a brief summary of 3D scanning and the process we use to capture and process a scan.
So what exactly is a 3D scan?
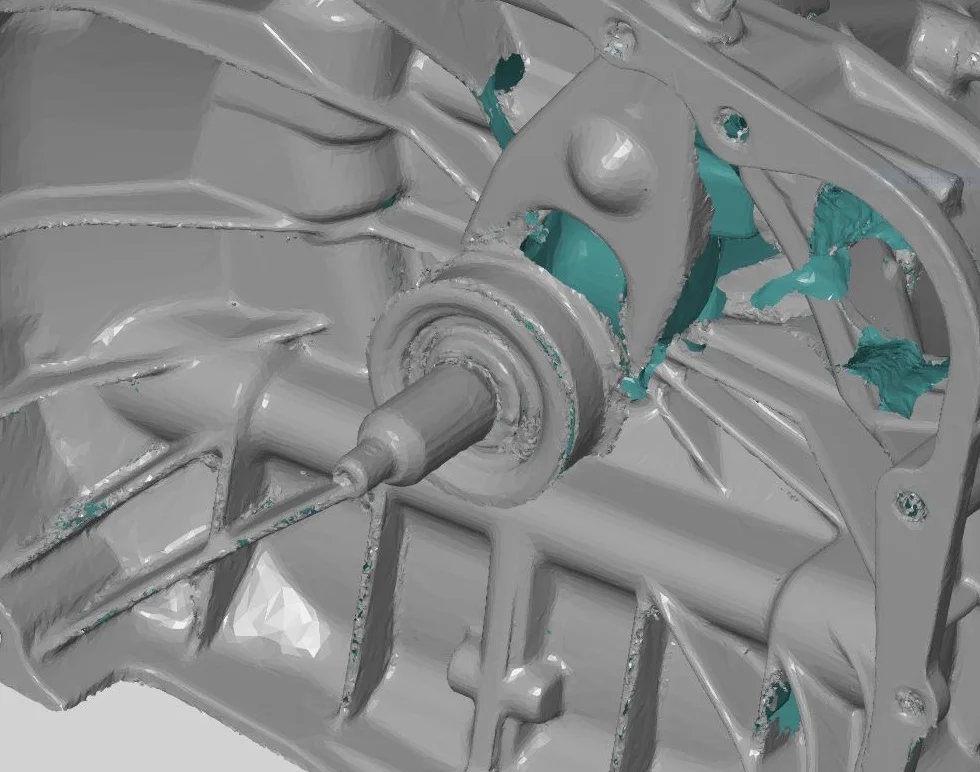
A 3D scan is basically a way of capturing an item in 3D space - think of it like capturing a video, only in 3D, so you can rotate it on the screen and view it from all angles.
The scan itself is a collection of data points taken from the item's outer surface, which are then joined together with thousands of triangles to create a "triangulated mesh" model. This mesh can then be smoothed to appear as a solid surface, and even have texture mapped onto it so it appears to have the same colour as the scanned object.
It's worth noting that these triangulated models are not "proper" surfaces like those that would be generated using CAD software. You can't select faces, edges or the centre of holes from a scan, as there is not an exact surface, line or circle defining those features, just a bunch of points that are within the tolerance of the scanner's capabilities that look like a surface.
A key word for scan files in this form is 'visualisation'. You can visualise, or see, a cylinder, but it hasn't been created as a cylinder CAD software so you can't change the diameter of it.
How is it done?
There are two primary methods. Stereoscopic and Time-Of-Flight
Stereoscopic scanning works very similarly to the human visual system. A known image is projected on to the surface to be scanned (often this happens so fast the human eye can't see it happening). Two cameras located a known distance apart observe the pattern. By comparing the differences in the images the shape of the surface can be defined and mapped as discreet points in space.
Time-of-flight systems work similar to radar. A signal (typically in the form of a laser) is sent out from a known point, at a known time, in a known direction. The system then times how long it takes for each part of the signal to return as a reflection from the scanned surface. The differences in time represent different differences that the surface is away form the signal. This allows the points to be positioned in 3D space.
What's the scanning process?
It varies depending on the equipment you're using, but with the hand held scanner that we typically use, it generally goes like this:
What are CAD artefacts?
A CAD artefact is a mathematically derived CAD feature which can be manipulated in CAD packages. In our Premium File Packs we provide CAD artefacts of key areas of a scan model. These are created using software which, when told what to look for, and approximately where to look, can identify features like cylinders or planes in a scan file.
Raw STL file ready for CAD artefact
CAD artefact applied to STL
In our Premium File Packs we provide CAD artefacts of important interfaces with the scanned product.
How can I position my scan?
All CAD projects are positioned in 3D space with the origin (0,0,0) at a certain position and the 3 default orthogonal planes at a certain orientation.
When we scan an object we assign an origin and orientation that we think will best suit the users of the scans. However it is unlikely to be exactly what matches your project. What this means is that, if you have designed a chassis for a project and want to see if an engine will fit (by purchasing one of our scans) when you load our scan in to your project it is likely the engine will not be anywhere near the correct location or orientation. To get the best value from your investment you need to use your CAD software to move the chassis or the engine in to the correct position.
Typically there are two ways to do this repositioning:
1. The first is a visual, or manual, alignment. This means manually entering incremental movements to relocate an object in 3D space and repeating it as necessarily to get closer and closer to the correct position until the user is satisfied it is close enough. For relocating in X,Y,Z positions this is quite straight forward. It can get a bit trickier when needing to change orientation by rotating about different axis.
2. The other method is to use the construction capabilities within the CAD software to 'assemble' the parts. This requires CAD artefacts. In these cases you can, for example, select the centre of an engine mount on the chassis and the centre of a bolt on the engine and force them to be concentric. Conditions like this are built up until all 6 degrees of freedom (or as many as you need) are correctly positioned and aligned.
Can I try out one of your scans?
Of course! A sample scan file is available for you to download for free and test out in your CAD software to make sure it is suitable for your requirements before making a purchase:


